Try the 3CX IP PBX for free.
- To get free trial license. Follow the link and register with e-mail and name.
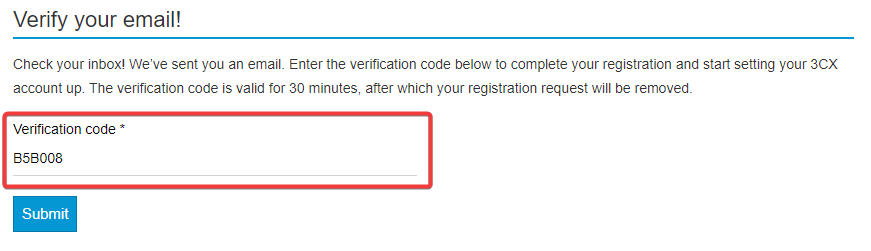
- Enter the "Verification Code" in the mail you received to verification filed on 3cx.com then press submit to proceed to next step.
- Confirm your e-mail address with button that int the mail content. Proceed to the next steps by entering required information from the page you are directed to.
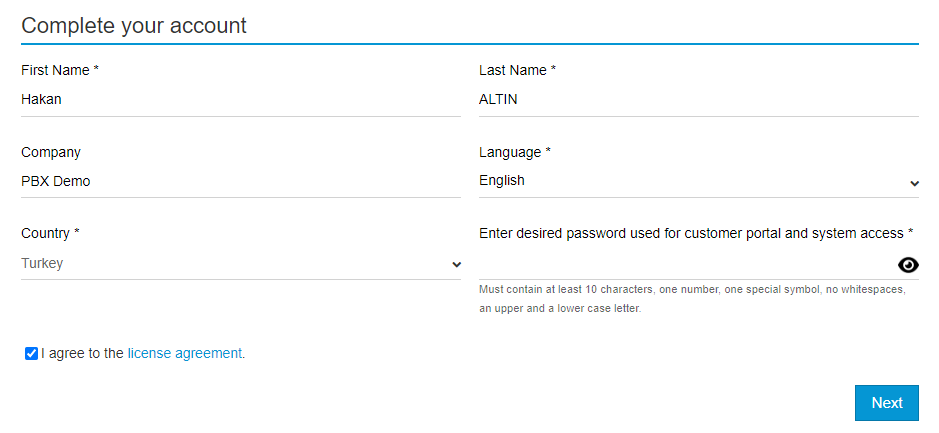
- Enter your name in the "First Name" field.
- Enter your last name in the "Last Name" field.
- Enter your Company name in the "Company" field. Note: You can enter your name and surname as a person.
- In the "Language" field, select your language.
- Select your Country in the "Country" fields.
- In the "Enter desired password used for customer portal and stem access" field, please specify your 10-digit password containing at least 1 Upper/Small letter and number. This password will be used to login to your login.3cx.com address and the 3cx administration screen you will set up.
- After accepting the agreement, proceed to the next step with the "Next" button.
Not
The login.3cx.com page is your administration page where you can edit the registration information about your license key, change your FQDN address, and request support.
- Choose the right 3cx setup based on your company size and needs.
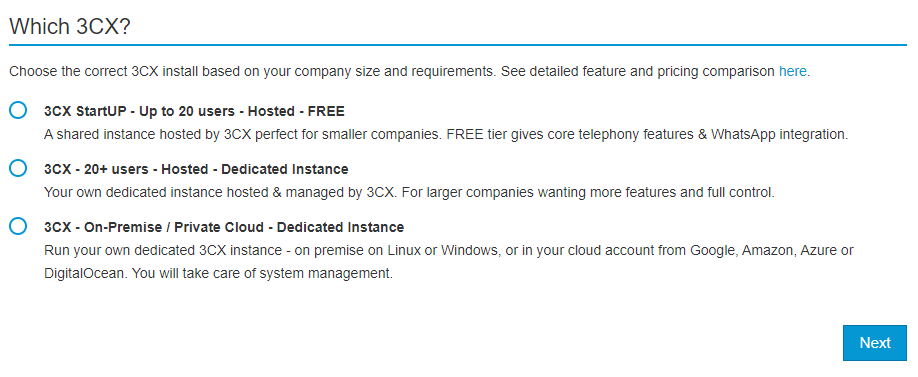
- 3CX StartUP - UP to 20 users - Hosted - FREE: It is suitable for small companies that want to serve up to 20 users with basic PBX features hosted on 3CX servers. You can find the details here.
- 3CX StartUP - 20+ users - Hosted - Dedicated Instance: On a dedicated server hosted and managed by 3cx. Suitable for larger companies that want more features and full control.
- 3CX - On-Premise / Private Cloud - Dedicated Instance: You can install it on your own servers such as Windows/Linux or Google, Amazon, Azure etc. If you want to install it on your own cloud servers, you can choose this option.
- Determine your FQDN address
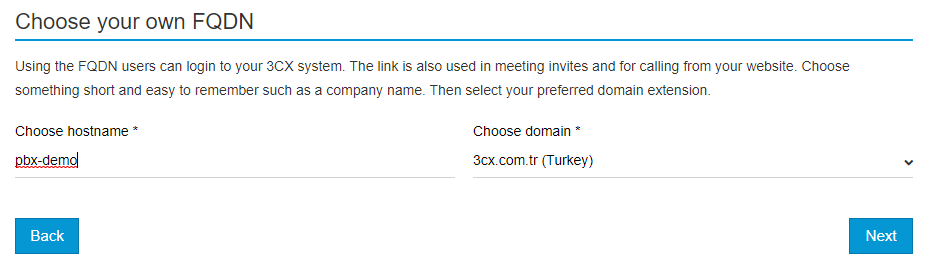
- Specify a prefix of at least 4 characters in the "Choose Hostname" field. E.g. your company name
- Select the domain extension you want to use from the "Choose domain" list. eg. For Türkiye, you can choose the 3cx.com.tr extension.
- Select the number of digits required for your extension numbers according to the number of users in your company.
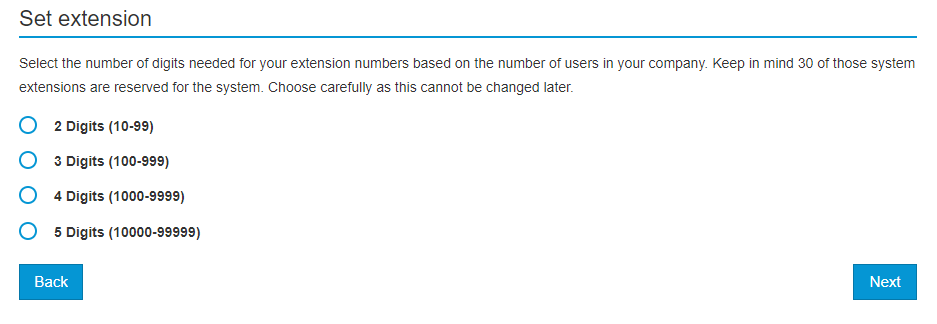
Attention
The number length cannot be changed after the system is installed. This option is not available when restoring from backup. In cases where the number length needs to be changed, the system must be set up from the beginning.
- Select the platform to setup to.
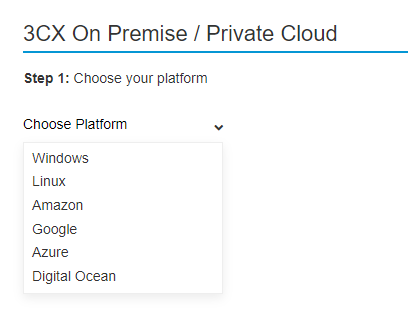
-
"Windows or Linux" Recommended Choose to install on your virtual or physical server.
- "Self-hosted with your clod provider" Choose to setup your account in server hosting centers such as Google, Amazon, Azure, Digital Ocean. You can access detailed information at 3cx.com.
- The following screen contains all the file information required for installation.
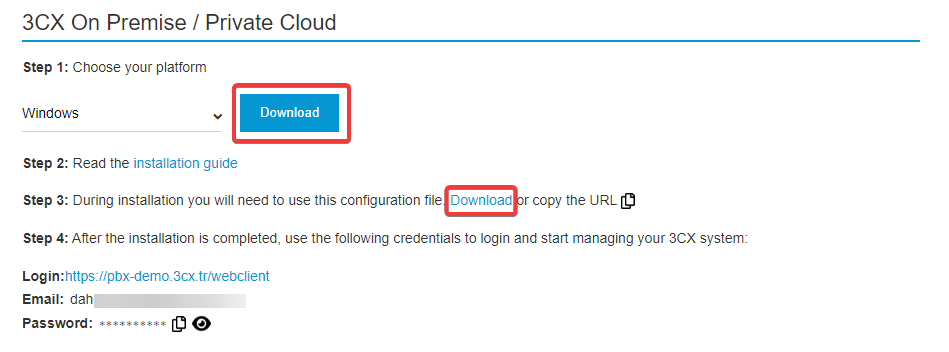
- "Chose your platform" Download the Windwos or Linux installation package according to your preference by pressing the Download button.
- By clicking the Donwload button in step 3, download the configuration file that you will automatically upload your settings to during the installation.
- After the installation is completed in step 4, you can enter your user name and password information, which you can enter into the system's management interface and login.3cx.com customer portal. Do not forget to take note of this information.