3CX V18 Installing on Debian Operating System
- Download required file 3CX Debian 10 ISO.
- If you are installing a virtual server. Set the CD option to boot from the ISO file and make sure the CD drive is set to mount at startup. If you are installing on a physical server, create a Bootable USB disk, plug it into one of your physical server's USB ports, set the BIOS to start from the USB drive to start the installation. More information about Bootable USB disk,
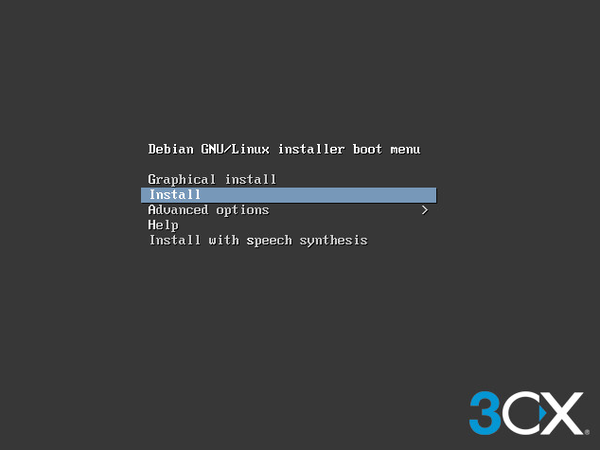
- Boot your system with the downloaded 3CX ISO, select "Install" from the main boot screen and press <Enter>.
- Recommended You must configure a static IP address for the 3CX host. Select <Return> or press the "ESC" key when prompted for the hostname to set the IP address of the system first and then configure the hostname. The system's IP address affects running PBX services, connected clients, and IP phones. To change the IP address on a running 3CX system, you must reboot the machine and then re-provision the connected applications and IP phones. If you don't want to set a static IP address, proceed to Step 6.
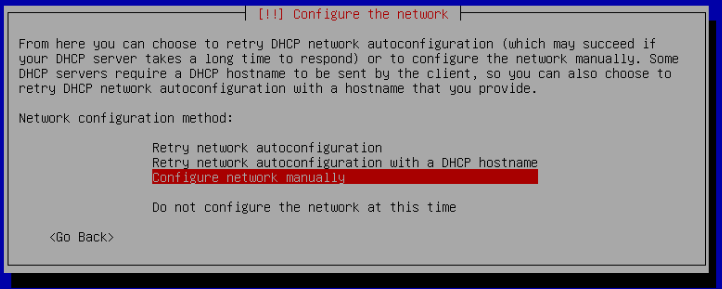
- Select "Configure Network Manually" and press <Enter> to set the static IP address of the system. Select <Continue> to enter the subnet mask and enter the default gateway IP address and select <Continue>. Finally, enter the IP addresses of the DNS servers and select <Continue>.
- Enter a Hostname for the server so you can easily identify it on your network.
- Enter a domain name. use the same space you use on other computers on the network, eg. my company.com Select <Continue> to continue.
- Select the default system language and press <Enter>.
- Select your location from the Location menu and press <Enter> to continue.
- Specify the root account password for the machine and select <Continue> to re-enter the password for verification. Finally, select <Continue> to continue.
Important
Determine strong password for root user. root user has all privileges.
- Select the system time zone and press <Enter> to continue.
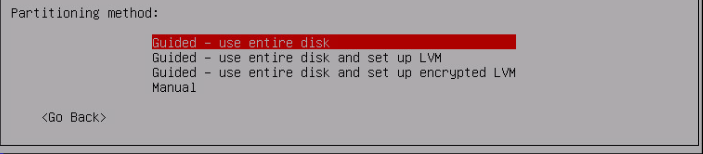
- Partition your disk by selecting "Guided - use entire disk". Press <Enter> to continue.
Confirm your disc selection by pressing the <Enter> key. - Select the "All files in one partition" partition scheme and press <Enter> to continue.
- Select "Finish partitioning and write changes to disk" and press <Enter> to continue the 3CX Debian installation.
- Select 'Yes' and press <Enter> to confirm writing the changes to disk. The installation process may take about 5-20 minutes depending on the performance of your machine. When the Debian installer is finished, your server will reboot and the 3CX installation will start automatically.
- Now select the 3CX package to install on the “3CX Update Channel” screen. Select "3CX Stable". On the "Configuring unattended-upgrades" screen, select <Ok> to accept the 3CX License Agreement.
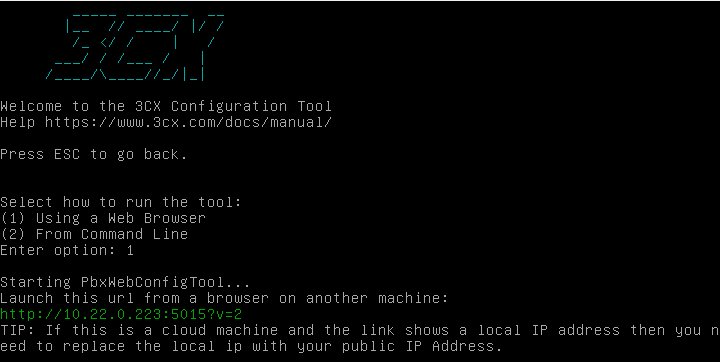
- After the 3CX installation is complete and the machine has rebooted, run the 3CX configuration wizard as follows:
- (1) a web browser to open http://<server ip address>:5015.
- (2) the command line.
Select option 1
- To complete the setup visit our Web Configuration page.