3CX V18 First Configuration
1. Adım: Run PBX configuration wizard
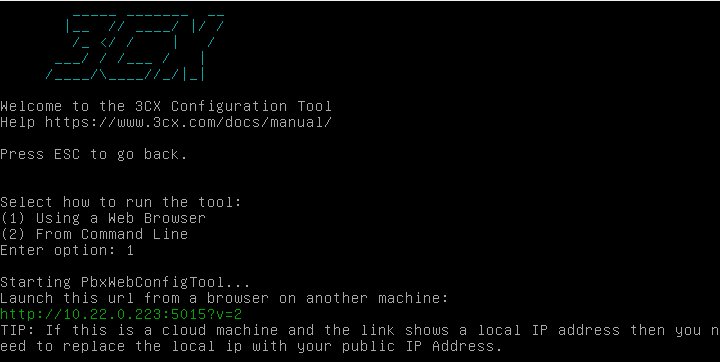
Once 3CX is installed, the 3CX PBX Web Configuration Tool guides you through important network and security settings.
(1) Using a web Browser: Recommended If you have completed our installation in Windows operating system, the configuration page will automatically open from your default browser. If you have completed it in Debian operating system, you can access it by typing http://<3cx server ip address>:5015?v=2 (eg http://10.22.0.223:5015?v=2) in your browser's address line from a different pc on the same network. .
(2) From Command Line: You can continue with this option to complete the installation from the command screen.
Important
2nd Step: New Setup, Restoring From Backup, Creating an Admin User
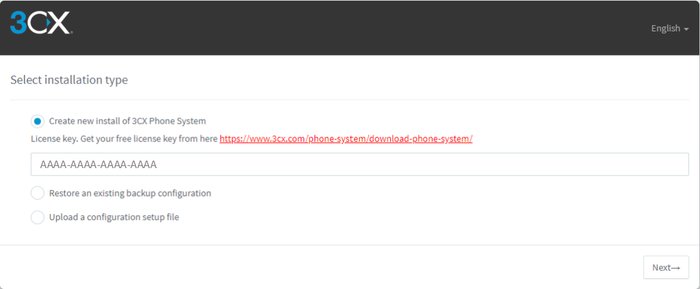
- Choose your installation preference and click the "Next" button:
- If you are going to install a new system, continue with the "Create new install of 3CX phone System" option.
- To install from your existing old system backup, continue with the "Restore an existing backup configuration" option and upload your backup file with the "Upload" button.
- If you have a configuration setup file to use, continue with the "Upload a configuration setup file" option and upload your configuration file with the "Upload" button.
- Create a strong, case-sensitive 10-character password with at least 1 digit to access the Management Console and prevent unauthorized access to your PBX.
- The configuration page will automatically detect your Public (WAN Public) IP address. In case your HTTP traffic is routed over a different network, select "No, I want to enter it manually" to manually enter your public IP. Continue with the "Next" button.
- Indicate whether your WAN IP address is Static or Dynamic. Recommended is the use of Static IP address. If you have a dynamic IP address, you should continue with the FQDN address option provided by 3CX in the next step in selecting the FQDN address. The 3CX FQDN service will periodically update your floating IP address information. Detection and updating of your IP address change takes place within 5 to 30 minutes.
3rd Step: Determine your FQDN
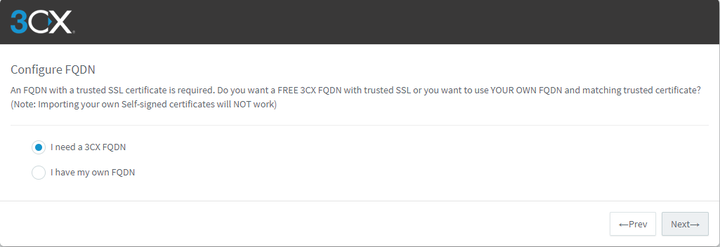
- 3CX requires an FQDN and a matching SSL certificate to run smoothly in and out of the office.
- If you do not have an SSL certified FQDN address to be used in the exchange system, continue with the "I need a 3CX FQDN" option.
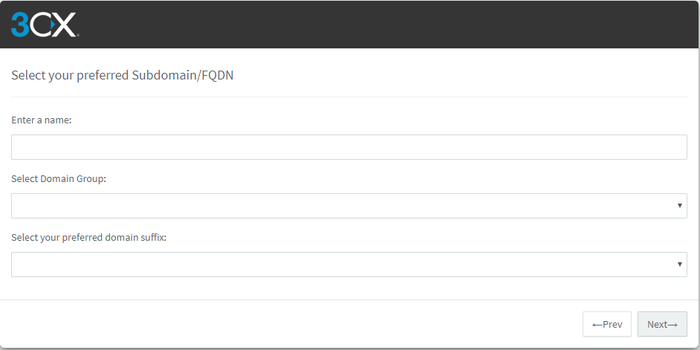
- You can enter your company name in the "Enter a name" field.
- Select your region in the "Select Domain Group" field.
- Select your preffered domain suffix in the "Select your prefered domain suffix" field.
Note
-
- If you want to use a subdomain name from your company's domain, you can continue with pbx.mycompany.com "I have my own FQDN" option.
Important
- Enter your domain name reserverd for your PBX eg. "pbx.mycompant.com".
- Show the path to your SSL cerfiticate file with the PFX extension.
- Enter your password you set for your PFX extension SSL certificate.
4. Adım: Select DNS type and Ports
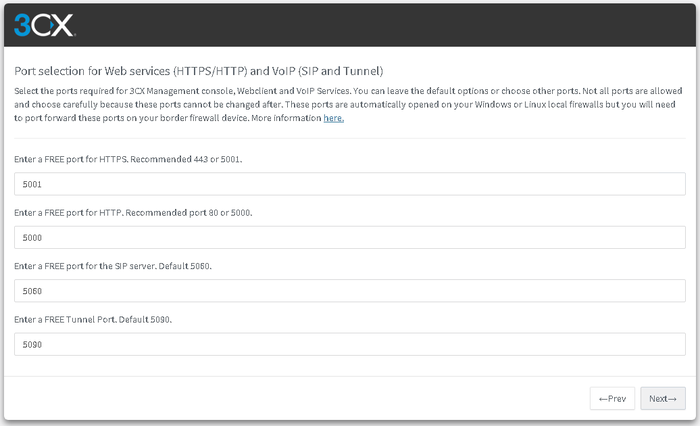
- Select which ports you want to use for the Web Management console and VoIP services (SIP and Tunnel ports). 3CX detects if you are using NAT.
- HTTPS (Default 5001 TCP): It is the port used to access the management panel from outside your business, to pull the configuration files of ip phones and 3CX mobile applications and to access the directory list.
- HTTP (Default 5000 TCP): It is the port used to access the management panel from inside your business, to pull the configuration files of ip phones and 3CX mobile applications and to access the directory list.
- SIP (Default 5060 TCP&UDP): It is the port required for your business to communicate with voice operator, ip phones and 3cx applications both inside and outside the office.
- Tunnel (Default 5090 TCP&UDP): It is the required port for 3cx applications (Mobile, Windows, Mac, Webclient) and 3CX SBC applications to be connected from outside your company's network.
NOTE
Attention
- Select your default network adapter. If you have more than one network adapter, make sure to select the network adapter that has internet access in the 3CX IP phone system.
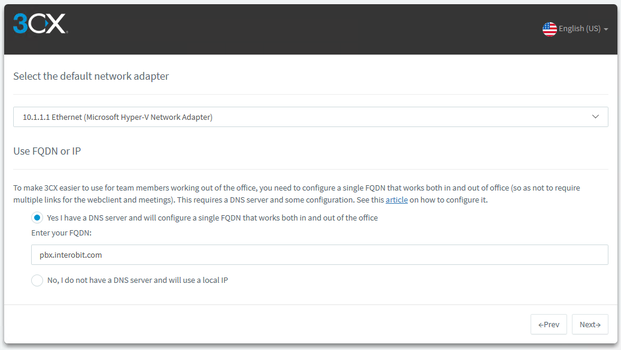
- Local IP: Recommened If your business does not use Microsoft DNS Server, you can choose ip phones and 3CX applications to communicate with your server from the local ip address.
- Yes I have a DNS server and will configure a single a FQDN that works both in and out of the office: If there is a DNS server that you can manage in your business and you want to use the 3CX IP Switchboard system as a failover, continue with this option.
- Continue by typing the domain name of your server in your DNS server. eg. 3cxserver.firm.local
- No, I do not manage a DNS server and will use a local IP: If you do not have a Managed DNS server in your company, you can use an IP address for internal communication.
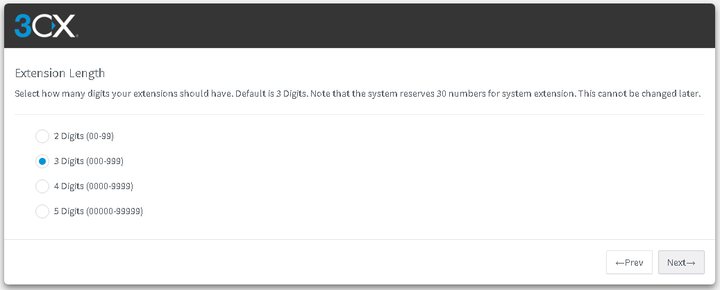
- Specify the extension number length that will work in the 3CX IP Phone system.
Attention
5th Step: Final Configuration Options
- Admin Email: Enter the system administrator e-mail address. The 3CX IP Phone system will inform you about 3CX updates, service errors, hacking attempts, network errors etc.
- Mail Server Configuration: By default it is set to send mail via 3CX SMTP Server. Users whose license version is Pro or Enterprise can continue with Custom SMTP server, Gmail, Outlook, Office365 options from the list.
- Select Country and Time Zone: Specify your country and time zone settings. These settings are for IP phones to receive the correct date and time information. Does not apply to 3CX server.
- Operator Extension: On the Operator extension screen, we define an extension to serve as the operator in the system. It should be noted here that the Email Address field is mandatory. If the operator extension is desired, you can change it under the Settings\PBX menu after installation.
- Countries calls can be made to: You can give the necessary permissions from the table of countries where it will be allowed to initiate calls via the 3CX system. By default, only calls to countries other than the country you specified in Step 3 will be turned off. You can change the selections made here under the Settings\Security Settings\Allowed Country Codes menu after the installation is complete.
- Select Language: Indicate in which language the voice response system of the 3CX System will serve.
Note
- Registiration Details: Your 3CX license key must be registered by entering the required information to register with 3CX registration servers.

- Contact Name: Name and surname of the owner of the company who purchased the license key (NOT the name of any employee or dealer in the company)
- Company Name: The company name to which the license key will be associated. License keys associated with the company cannot be transferred to another company and cannot be changed.
- Email: It is recommended to have the e-mail address of the license holder specified in the Contact Name field. You can also enter a common e-mail address from the e-mail server containing the company name.
Important: The e-mail address cannot be changed after the licensing process is completed. Do not enter the e-mail addresses of the company owner or employees who are not authorized to sign.
- Phone: Company Number Format: +90 XXX XXX XX XX etc.
- Country: Select the country where the system will serve from the list.
- Reseller ID: Enter the 3CX Reseller ID code of the dealer from which you purchased your license. (You can leave this option blank and log in from the Dashboard/Reseller menu after the installation is complete.)
With the Finish button, you can complete the installation and access the 3CX Management screen.